COMGA

Monday, July 27, 2015

OSU Gardening Classes for Everyone

I'll bet you've been wishing there were gardening classes taught by experts that wouldn't cost an arm and a leg - right?

If you can get over to Linfield College in McMinnville August 7 & 8, we've got some great classes for you!!!


Here's the scoop: the Oregon Master Gardener Association holds a Mini-College for gardeners every summer - all gardeners, all ages, all skills, all levels of interest. It's kind of a huge party for those of us who love to dig in the dirt, making the world a prettier, healthier place to live.

The price is really great: take three Friday or three Saturday classes for $40. There's even more fun stuff going on including a silent auction and fund-raising sales held by the OMGA chapters. Check out the list of the classes (full descriptions are on the website: http://omga.org/mini-college/).

Friday - First Session (10:15 to 11:30am):
    • Fun with Hardy Succulents 
    • Eat More Flowers! 
    • Microgreens 
    • Grafting Apple Trees 
    • Seed Saving 
    • Seed to Supper Panel 
    • Biological Controls in the Garden
Friday - Second Session (1:15 to 2:30pm):
    • Fun with Hardy Succulents (repeat of Session 1)
    • Fire Resistant Plants
    • Hot Weather Crops in Cool Climates
    • Beat the Bugs to Your Produce
    • Backyard Composting
    • The Enabling Garden
    • Pruning Berries and Grapes
    • OR Season Tracker - Take the Nation's Pulse (part 1)
Friday - Third Session (3:00 to 4:15pm):
    • Hellebores
    • Native Plants Through the Seasons
    • Preserving for Year-Round Enjoyment
    • Tours (choose 1)
    • Ethnobotany of the Pacific NW
    • Plant Problem Scenarios
    • Pruning Berries and Grapes (repeat of Session 2)
    • OR Season Tracker - Take the Nation's Pulse (part 2)
 Saturday-  Fourth Session (10:15 to 11:30am)
    • Doing Dahlias the Easy Way
    • Developing New Landscape Plants
    • Strawberries
    • Root Crops
    • Broken Pot Spiral
    • Plant Problem Scenario Project
    •  Chewing Insect ID
Saturday - Fifth Session (1:15 to 2:30pm)
    • Orchids of the High Andes
    • Native Pollinators 
    • Quince: An Unexpected Jouney
    • Growing Fine Wine
    • Fall Cover Crops & Mulches
    • Successful Seed Starting
    • Sucking Insect ID
Saturday - Sixth Session (3:00 to 4:15pm)
    • The Vertical Garden - All Kinds of Vines!
    • Home Tree Care: The Necessary Skills
    • Hot Weather Crops in Cool Climates (repeat of Friday's session 2)
    • Grafted Vegetables - A New Frontier
    • Weeds - We All Have Them
    • Soil Sampling and Interpretation
    • Biological Controls in the Garden (repeat of Friday's session 1) 
I hope to see you in McMinnville, sharing all your experiences and picking up some new information with the Master Gardeners!

Saturday, July 25, 2015

Flowering Vines

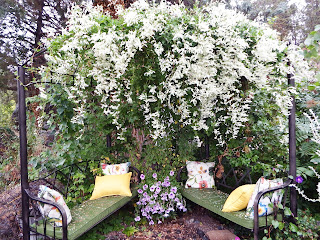
Silver Lace Vine in September

Is it possible that I grew this plant??? Amazing, right?

As you can see, it's a Silver Lace Vine growing above my seating area. It's about three years old and, just like a perennial, the growth leaped the third year. In fact, I'm going to have to watch (and maybe prune)  the woody vines to be sure they don't grow so large that they pull down the overhead support! But what a wonderful vine it has become.

My experience with this Silver Lace Vine encouraged me to try more flowering vines this summer.

Of course, almost all gardeners have grown Morning Glory at some time since it's so easy to grow and covers all manner of ugly fences, garage walls and compost bins. But what else is out there and able to reach the flowering stage in our limited Central Oregon growing season?

Have you ever grown green beans?  I've always been impressed with the luscious vine that a single dried green bean seed can sprout and the pretty white flowers that precede the bean pods. But this year I've finally planted some Scarlet Runner Beans in a container on my deck - the large-leafed vines are inter-twining everywhere they can: along the railing, up the tomato support in the next pot, even around the deck chair back braces. The red-orange flowers have gotten the attention of a few hummingbirds as a bonus.

Last summer on a whim, I tried growing a perennial Sweet Pea.  I've always grown annual Sweet Peas and doubted that the perennial variety would be as pretty but I was just delighted with the huge clusters of blooms that grew all over my archway trellis.  They don't seem to have the lovely fragrance of the annual Sweet Peas but make up for it with enthusiastic growth - I have had to tie them back a few times this summer just so I can walk under the arch. They seem to represent the abundance of summer.

My new vine this summer is called Cypress Vine.
photo: Renee's Garden Seeds
In some more temperate climates I understand it may be invasive but I'm growing it in a pot and letting it wind up a few bamboo stakes. I'm hoping the visiting hummingbirds will appreciate the red trumpet flowers.

And my old favorite, Thunbergia, the Black-eyed Susan Vine, is summering outside again.  It wintered over beautifully in a cool, south-facing room and even produced a few flowers when the sun warmed the room enough in early Spring. The bright-faced yellow flowers were such a joy to see in March and April and they're now lighting up a corner of the deck. They're a happy sight at our summer dinners.

Thunbergia: Black-eyed Susan Vine 


Have you been growing any flowering vines this summer? Do you have any suggestions for a vine I can try next year? Where do your vines grow - on a trellis? an arbor? a fence? I look forward to reading about your experiences in the Comments.

Wednesday, July 22, 2015

Old Friends

Am I the only one who greets my flowering plants every summer like old friends: happy to enjoy their good cheer and colorful faces for another season?

Okay, maybe it's just me. But the enthusiasm of a bright yellow sunflower turning to face the sun fills me with hope for the day. And the delicate petals of the hollyhocks climbing up the tall stems seem to promise that beauty will win against all odds.

Every summer my garden looks like a Victorian lady (with the help of her gardener, no doubt) looked through her copy of Jane Loudon's "Gardening for Ladies" and chose her flowers with her future parlor bouquets in mind. As I freely admit, I'm a well-intentioned but lazy gardener who grows plants that will survive my neglect. Ironically, I love flowers and want to have armfuls of them to carry into the kitchen and arrange in huge bouquets for the table.

So - how can I make this possible?

I've found that the traditional plants have lasted so long in spite of gardeners like me - they have withstood the lack of regular fertilizing, forgetful watering schedules, free-ranging critters and an occasional frost, yet continue to grow and even flower. If you're having any trouble growing flowers, consider these traditional plants that have grown so well in my garden:

Siberian Iris
Bulbs/Rhizomes/Tubers
    • Daylily 
    • Daffodils
    • Iris (Siberian, Bearded and Beardless)
  Annuals
    • Zinnia (the traditional flower now comes in large, medium and tiny sizes)
    • Sunflowers (the birds help reseed them every year)
    • Alyssum (it reseeds itself under normal conditions) 
    • Petunia (in a winter cold frame or greenhouse, they'll reseed)
    • Poppy (Orientals, Shirleys, California)
    •  Scabiosa (also called the Pincushion Flower)
      Scabiosa
Biennials
    • Foxglove (there are also perennial varieties) 
    •  Hollyhocks (flowering the 2nd year but reseeding easily)
    • Several varieties of Hollyhocks
Perennials
    • Sweet Peas (I like the perennial since I don't have to re-plant every summer)
    • Delphinium (the annual version is Larkspur and it reseeds very easily)
    • Aster
    • Lamb's Ear
    • Monarda (also called Bee Balm)
    • Columbine 
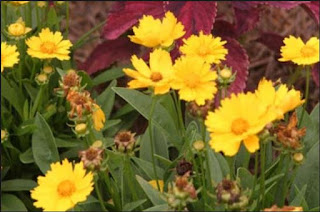
    • Coreopsis
    • Cornflower or Bachelor's Button (there's also annual Bachelor Button)
    •  Coreopsis (I grow the screaming yellow variety - it can be seen for blocks!)

I also love growing the flowering, traditional herbs - some in containers and some in the flower garden as ground covers.  Almost all herbs like a dry, hot soil which makes them perfect for Central Oregon. Be aware, though, that some, like Basil and Parsley, are tender and like a moist environment so they take extra care and attention. But if you grow Cilantro you get a now-and-later plant: when it goes to seed, you've got Coriander!

My garden has other plants, of course, but these are the ones I rely on every summer to fill my home and my heart with fragrant good cheer.
Lamb's Ear in bloom

Sunday, July 19, 2015

New Plants from Old Stems?

How cool is it that you can get new plants relatively easily from old ones? Every year I buy seeds and seedling mix and start dozens of plants in my warm March bathroom.  But I also try (I don't always succeed) to take cuttings from plants I like and grow new ones.

Some of the plants are my own, some belong to friends. I've learned that a gardener with a beautiful plant is always pleased to be asked for a cutting since it means they've grown a great plant well enough to be coveted. (A little praise also eases the request, too.) And if we choose carefully, the cutting can help the plant, as good pruning usually does.

When my own plants get overgrown and leggy, some of the stem tips I snip off become new plants. Every fall I snap off the longest stems of my geraniums (pelargoniums, not true geraniums)
and pot them up in a loose potting soil, to produce roots over the winter in my unheated garden room. By late Spring, they're ready for their own pots on the porch steps. Some of the plants growing there all summer are more than ten years old - if you consider the rooted stems are part of the original plants.

I also grow Coleus for my hubby - he likes the amazing colors the professional horticulturists have developed: purple, flame-red, lime green, sometimes with ruffled edges and multiple colors on the same leaf. So I either grow them from seed or buy some of the more unique plants every summer. Since Coleus will branch if I pinch the smallest leaves at the end of each stem, I maintain the plants all summer with little snips. But by the end of summer, the plants are big and blousy so I get more serious with my pinches, taking three sets of leaves with each pinch. These little stems will root in water wherever there was a leaf node- you can see the node here where the lowest leaves were stripped off.
extension.missouri.edu
I want to have four leaves above the water to keep the photosynthesis going and two nodes below to develop roots. I've collected lots of little glass containers (jars, drinking glasses, vases) and they look sweet sitting on my kitchen windowsill with tiny plants growing in water. Once the roots are well developed, I pot the little plants up in potting soil and my hubby has a whole new Coleus garden to admire.

This whole process is called Propagating from Stem Cuttings and the Coleus is the simplest since it has a succulent-type stem that holds water easily. Besides coleus, I've grown Basil, Tradescantia (commonly called Wandering Jew) and Pothos in water. If you have a stem that is more woody, the process is a little more complicated since you'll need rooting hormone and potting soil or sharp sand to start the roots.

There's lots of information in these two publications if you're adventurous and want to try something new:
http://4h.wsu.edu/em2778cd/pdf/pnw0151.pdf
http://www.hort.purdue.edu/ext/ho-37web.html

You can even start new plants from a leaf! You can't do it with every plant but it's pretty crazy to see when it works - the two publications will tell you how, if you're curious. For right now I've got a grocery store Leek on my windowsill - the Leek stem has been eaten but the base has been carefully watered until a stem sprouted.  Once it's big enough, it'll be planted out in the vegetable garden, growing for an autumn soup, flavored with the Rosemary I grew from a stem from Trader Joe's refrigerated herb section. What fun!

Thursday, July 16, 2015

Grow a Cutting Garden

A friend of mine has the most beautiful native, xeriscape gardens. She and her husband worked with a designer to plan a landscape that not only looks natural and appropriate for their beautiful new Craftsman-type home, it's full of gorgeous, flowering plants that flourish in the Central Oregon climate.

Why do some of us take a different route and design specific garden rooms or ornate parterres with winding pathways or cutting gardens with dozens of labor-intense annuals? Why do some of us have gardens that require so much effort to maintain despite our high desert climate?

Why indeed.

As you may have learned if you've read a couple of my blog posts, I'm not the most thoughtful of garden designers.  I've been known to buy a stunning plant at the nursery and then come home to figure out where on earth I'm going to put it! I've learned to read the plant label so I no longer bring home the plants that are doomed from the beginning (wrong soil type, wrong hardiness zone, not deer resistant) but I seem to be a prime target for every pretty bloom grown in a nursery.

So I've decided to focus my sometimes wild eyes on those perennials that will give me bouquets every summer. Since it's a long list I'll have lots of potential for my beloved plant shopping but not so long that I'll go broke before I buy them all.  And, as perennials, I shouldn't have to keep buying them, year after year (unless I kill off too many).

Now to determine what would be in a list of cutting garden perennials. Since they'll be in a bed by themselves, I don't have to worry about the design (color, size, sun/shade exposure) but their water needs should all be compatible to manage the irrigation schedule.

I should choose plants that will give me blooms from Spring through Summer, into Fall if possible. My favorite bouquets have a mix of flower types so I'll need to think about the flower shape - not all daisy-types, not all tiny forget-me-nots, not all spiky salvias and delphiniums.

Lastly, I think I should add some annuals to augment my perennial blooms: they'll produce flowers for a longer time and the professional growers come up with new varieties I can try every year without breaking my garden budget.

That's it, my plan is ready and now I can get to the best part: shopping!

This University of Vermont Extension publication has lots of good information: http://pss.uvm.edu/ppp/articles/cutgardn.html 
and this is a good one from Penn State Extension http://extension.psu.edu/plants/gardening/fact-sheets/perennial-garden/great-cut-flowers-from-your-home-garden.

Monday, July 13, 2015

Deadheads Aren't Always About Music

Am I showing my age with that title?

I was working in the garden this morning, thinking of Jerry Garcia and the Grateful Dead's lovely loose-strung guitar, while deadheading my Coreopsis.  A tedious chore made a little easier with some great memories.

Ah well.

But it made me think about what many new gardeners may be missing - not just some great music, but a second round of flowers later this summer.

Do you deadhead? Do you know what the *!&(#!@*&*^% I'm talking about? Here's what a Coreopsis looks like before deadheading:

See all the spent flower heads? If the deer haven't snipped off the flowers, the stems dry and eventually schrivel up and fall but if I trim them off right away, I've fooled the plant into thinking that it didn't produce enough flowers before winter and it'll make more.  Pretty sneaky, right?

Actually, it's manipulating nature to benefit me. The flowers a plant produces are it's heritage - it "knows" that it needs to have progeny and the flowers will develop seeds for next year's plants. If the flowers don't reach that point, the plant will produce more flowers. The second crop may not be as lush as the first one, but it will be quite nice, as the summer winds down, to get just one more bouquet.

There are other reasons for deadheading, too.  I like to cut my Catmint (Nepeta mussinii) back after the first flowering so that the bees will get another round of flowers before they hibernate for winter. I don't take the flowers for bouquets so I wouldn't mind if they didn't flower, but it does make the native bees very happy.


And I try very hard to stay ahead of the little red poppies since each seed pod stores thousands of seeds.
Letting this year's plants set those seed pods is just asking for heavy duty work next summer, to say nothing about how the hundreds of poppy plants crowd out all my other herbaceous plants. That was a lesson that took me years to learn since I love self-seeding plants like larkspur, hollyhocks and sunflowers. But deadheading is my way to control the overwhelming amounts of the self-seeders: I remove the spent flowerheads before they form seeds and I'm back in control of what grows in the garden. And it seems kinder to remove the dead flowers than to pull out the young plants next year.

But if you don't get around to deadheading your flowers, reassure yourself that you're not a bad gardener, you're just providing more seeds for the birds to enjoy.

Here's a list of the plants that benefit the most from deadheading: http://extension.psu.edu/plants/master-gardener/counties/chester/how-to-gardening-brochures/deadheading

Saturday, July 11, 2015

My Simmer Lawn

That's not a typo - my lawn is not very large (it's all about the flower garden) but it's really simmering in the recent heat.

We have fallen down on maintaining the lawn this past Spring so I'm not surprised we have a 'crunchy' looking lawn this Summer. Even though we've been careful with not watering too much or too often, the lawn is suffering.

My dear husband's answer to a crummy looking lawn is more water.  If that doesn't work, it must mean we need even MORE water! And if the grass still seems more like a parking lot than a lawn, buy some fertilizer. And water some more.

 You know what Einstein said is the definition of insanity: Repeating the same action and expecting a different outcome. We don't need to add anything - we need to subtract. We've got a buildup of old grass stems and roots, and all that water isn't moving down very far.  Nature, being as accommodating as she is, has made the grass roots move up into the thatch layer, a fraction of an inch into the soil. Since the roots dry out faster that close to the surface, the grass needs more frequent watering and gets 'crunchy' really fast on hot days (the roots are heating up in the thin soil layer). And we probably have a bit of scalping - a unique problem of lawns with dense thatch layers when the lawn mower wheels sink into the thick pad of dead grass material, which lowers the blades & cuts the grass stems too short.


So now that I know what I've got, how do I prevent this from happening again?

I'll have to be patient & wait until cooler weather to remove the thatch.  I once tried to steel rake it out but it was deadly work and I don't think I was able to pull it all out. I've rented a mechanical dethatcher in the past but my hubby loves new toys and bought an electric one, about the size of a small lawnmower.

Once I've ripped out the thatch, I know the lawn will look terrible, so I'll put down some new grass seed in the bare spots and cover it with moist peat moss. It'll mean a little work to keep it damp until it sprouts but I know it's worth it.

The kind of grass I plant can affect the amount of thatch that builds up: Kentucky blue and creeping fescue seem to produce more thatch; perennial rye and tall fescue, less. I'd better choose carefully when I'm at the store.

My research also says that too much nitrogen fertilizer and too acidic a soil can increase thatch as well as excessive pesticide use, primarily fungicides. Insecticides can kill earthworms that help break down thatch so I'm going to keep a close eye on our use of all pesticides and make sure we use that handy-dandy dethatcher every other year, maybe alternating with an aerator to remove plugs from the lawn.

It's a lot of work to correct the problem so I'll have to try harder to keep the thatch at bay in the future. For now, I'm looking forward to a lush, green, fire-resistant lawn next summer!


Thursday, July 9, 2015

Tomato, ToMAHto, Let's Call the Whole Thing OFF

I'm having a little temper tantrum today. Bear with me.

I LOVE tomatoes. Big juicy beefsteak tomatoes on my hamburger.  Little sweet cherry tomatoes warm from the vine. Yellow Sungold gems bursting in my mouth. Even the exotic "blue" and purple ones, full of anti-oxidants, hiding in their juicy goodness.

Cornell University photo


Every March I carefully choose the tomatoes I expect to savour the coming summer and shop several nursery websites for seeds.  I buy good quality seed starting mix, sterilize my plastic seed-starting cells and set up my grow lights in the master bedroom shower (sorry, hubby, tomatoes have priority). Then I carefully place a few dozen seeds in the containers and add the little plant labels so I'll know who is who.

The excitement of seeing the new plants seemingly pop out of the soil goes a long way to brighten the dreary last days of winter and I'm always delighted to water, keep warm and, eventually, transplant the little plants.  Even at just 8 weeks of age, there is that unmistakeable smell of tomato leaf filling my bathroom.

Fast forward to late June, early July.  The little plants have been in the garden now for about 6 weeks and a few have tiny pale tomatoes low on the plants. Lots of green leaves, they're looking healthy if a bit small. The yellow flowers are appearing on schedule but - BUT - no tomatoes for the past couple weeks! Nothing! NOTHING!

WHAT IS GOING ON!?!!!??!! What could I have done wrong???

I've chosen several varieties of tomatoes, watered every other day and kept an eye out for low night-time temperatures in case I needed to cover the plants. I've put down a balanced (16-16-16) fertilizer every 4 weeks and there's no history of verticillium wilt in my garden. So far, I seem to have done everything right. So what's wrong?

I'm not accounting for Mother Nature.  She's been a false friend this summer, throwing 100+ degree days at us, for weeks without end. It's been lovely (for the vegetables) that the nights are cooling to just about 55 degrees and I thought the hot days would be enjoyed by every vegetable in the garden. I've been so wrong.

A horticulturist at the University of Maryland has studied tomato pollination and has learned some remarkable characteristics of tomatoes, especially those plants grown in greenhouses.

Those of us lucky enough to have hobby greenhouses know that, in summer, they can easily reach 115 degrees. What I didn't know until I read about the tomato temperature study done for Delaware Extension Service, is that tomato plants that are constantly exposed to daytime temps over 95, and nighttime temps over 80, produce fewer, less viable pollen grains. Since most pollen is shed between 10am & 4pm, if temps in those hours are higher than 103 degrees for 2 days in a row, fruit set won't happen. And you'll end up like I have, with nice big plants and lots of fading flowers but no tomatoes.

So until the temperatures drop, I'll have to enjoy the tomatoes that set before the 100+ days rolled in and wait for some more normal Central Oregon weather - as long as it doesn't bring us frost in July!!

If you'd like to read the University of Delaware Cooperative Extension report, click on the link: https://agdev.anr.udel.edu/weeklycropupdate/?p=4489


It's ironic that I've always grown tomatoes in the greenhouse and in the garden, thinking that the outside plants might make it to harvest but if they didn't, I always had my greenhouse plants. This may be the year that I'm dependent upon those outside plants to satisfy my tomato addiction.

After all, even a little harvest of home-grown is better than an abundance of store-bought!

Tuesday, July 7, 2015

A Fire Defensible Yard

A recent article in the paper got my attention: after a recent brush fire, a Bend Fire Fighter (they're some great people!) says the homeowners in the neighborhood helped the fire fighters by creating a defensible zone around their homes.

What exactly IS a defensible zone, you ask? And can it help if a wildfire or forest fire is headed your way?

I've found some interesting information from a couple universities in fire-prone places: California and Colorado.

We all have mental pictures of wildfires - flames leaping from treetop to treetop.  But fire is a nasty enemy that can move far more easily and far more quickly than most of us can imagine.

The first evidence of danger are wind-blown embers, traveling up to a mile ahead of a ground fire. If they land on combustible material, they've brought the fire directly to your front door.

As a wildfire gets closer, radiant air heats surface temperatures and combustible materials readily ignite.

What can you do? First, you need to think like a hungry fire - go after what is easiest to devour: dry ground materials. The dry brush under trees in the forest is great fuel - does your home have the same environment? Have you surrounded your house with wood bark chips? Many of us have chosen chips over compost mulch since the chips don't decompose as quickly and steal nitrogen from the plants nearby. But unless you've kept the bark chips damp (not a waterwise behaviour), they can ignite very easily. A safer answer would be gravel or rock. Or a ground cover since the best materials surrounding your home should be GREEN.


I've read about a fire behavour that's called Laddering - like climbing a ladder, the fire moves from the ground to taller and taller plants until the tallest trees are engulfed. Keeping the fire as low and close to the ground as possible decreases the temperatures and, therefore, the combustion.

Remove the brown in your yard: dead branches in shrubs, ornamental plants that have finished for the season and are now dormant and, especially, the lower branches of tall trees up to 15 feet, or one-third of the tree height.

Dense plantings make it easier for the wind to push the fire through the yard. If plants are spaced apart, it takes more effort for the wind to move the fire.
Riverside (CA) County Fire Dept.       


If your home sits on a steep slope or in a windswept location (usually at the top of a hill), the zone around your home needs to be even more carefully maintained. And don't forget that stack of winter firewood - be sure it's at least 30' from your house.

Once you've reviewed your current landscape and taken the steps to make it more defensible, it might be time to consider replacing your plants with more fire-resistant plants.

Keep in mind that nothing is fireproof - even metal and glass can melt in a very hot fire. Consider fire resistant plants that won't accelerate fire conditions:
  1. High moisture content in the leaves. Deciduous trees hold water better than evergreens. Succulents and sedums have a high water content.
  2. Little to no accumulated or seasonal dead vegetation in the plant, such as older dry needles in pines.
  3. Low resin plants: our local junipers have a high resin content and are very prone to ignition.
  4. Open branching to allow air to circulate, preventing wind from pushing fire  through the plant.
  5. Slow growth so regular pruning isn't needed to keep the plant open to the air.
 And don't forget to keep your rain gutters clear of debris - a single spark can bring the fire right into your house.

For a list of fire-resistant plants, look through this OSU publication for the Willamette Valley.  Choose plants for your Central Oregon Hardiness Zone, from 3 to 5, your water needs, and personal preferences (I like the bird and butterfly plants best). https://catalog.extension.oregonstate.edu/sites/catalog.extension.oregonstate.edu/files/project/supplemental/em9103/em9103print_0.pdf

With a little hard work and some timely rain, you can defend your home from wildfires.